Tel:
+86 13143444311
Email:sst@szsst88.com
Fax:+0086-755-27322278
Address:Building 9, First Industrial Zone, Tantou Industrial City, Songgang Street, Baoan District, Shenzhen 518105, Guangdong, China
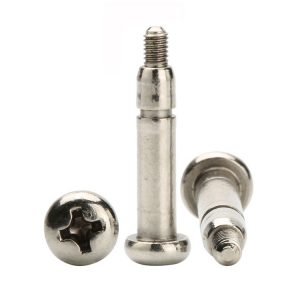
The zinc-coated layer of the hexagon socket shoulder screw does not exceed the part (basic size) in the case of external threads. After coating, the ordinary thread is in accordance with the provisions of GB/T 3934: the external thread is inspected separately with the tolerance zone position h or H. When the coated thread is tested with a ring gauge, the maximum allowable torque is: 0.001 (N·m). Where d is the nominal diameter of the thread (mm). Other socket shoulder screw dimensions are only applicable before coating.

In order to achieve the specified corrosion resistance, if the minimum coating thickness is specified, the thickness range of the zinc coating layer shall be such that the socket shoulder screw dimensions is substantially equal to the minimum coating thickness. Therefore, the estimated maximum zinc coating thickness is twice the minimum required coating thickness. See Table 1. The minimum basic deviation of the thread applied for coatings with a minimum thickness of 4 or 8 is also given in Table 1.
Table 1 Basic deviation of coating thickness and requirements of non-electrolytic zinc sheet μm
| Zinc sheet coating thickness | Minimum basic deviation required | |
| Min | Max(Expected value) | |
| 4 | 8 | 32 |
| 5 | 10 | 40 |
| 6 | 12 | 48 |
| 8 | 16 | 64 |
| 9 | 18 | 72 |
| 10 | 20 | 80 |
| 12 | 24 | 96 |
Note: Since the thickness of the zinc sheet coating on the fastener support surface may cause slack, and reduce the clamping load, it is an important factor to consider.
If the basic deviation given in Table 2 for a given thread does not meet the minimum coating thickness required, then:
Table 2 Theoretical deviation of the thickness of ordinary threaded non-electrolytic zinc sheet coating (μm)
| PitchP/mm | Coarse thread nominal diameter d/mm | External Thread | |||||
| Tolerance zone position g | Tolerance zone position f | Tolerance zone position e | |||||
| Basic deviation | Zinc sheet coating thickness max | Basic deviation | Zinc sheet coating thickness max | Basic deviation | Zinc sheet coating thickness max | ||
| 0.2 | -17 | 4 | |||||
| 0.25 | 1;1.2 | -18 | 4 | ||||
| 0.3 | 1.4 | -18 | 4 | ||||
| 0.35 | 1.5;1.8 | -19 | 4 | -34 | 8 | ||
| 0.4 | 2 | -19 | 4 | -34 | 8 | ||
| 0.45 | 2.5;2.2 | -20 | 5 | -35 | 8 | ||
| 0.5 | 3 | -20 | 5 | -36 | 9 | -50 | 12 |
| 0.6 | 3.5 | -21 | 5 | -36 | 9 | -53 | 13 |
| 0.7 | 4 | -22 | 5 | -38 | 9 | -56 | 14 |
| 0.75 | 4.5 | -22 | 5 | -38 | 9 | -56 | 14 |
| 0.8 | 5 | -24 | 6 | -38 | 9 | -60 | 15 |
| 1 | 6;7 | -26 | 6 | -40 | 10 | -60 | 15 |
| 1.25 | 8 | -28 | 7 | -42 | 10 | -63 | 15 |
| 1.5 | 10 | -32 | 8 | -45 | 11 | -67 | 16 |
| 1.75 | 12 | -34 | 8 | -48 | 12 | -71 | 17 |
Note:
If you want to customized socket shoulder screw dimensions please send an email: annie.li@szsst88.com
12 月-30-2018
kalyn

 +86 13143444311
 sst@szsst88.com