Tel:
+86 13143444311
Email:sst@szsst88.com
Fax:+0086-755-27322278
Address:Building 9, First Industrial Zone, Tantou Industrial City, Songgang Street, Baoan District, Shenzhen 518105, Guangdong, China
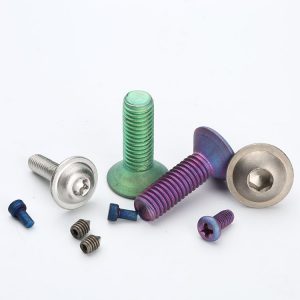
Metric machine screws Head height: The head height should be measured parallel to the screw axis at the metal body part of the top surface of the screw head. That is, due to the slot or the cross slot, the portion intercepted on the top surface of the head cannot be calculated in the head height range.
For a flat head with a bearing surface, the head height should be measured from the top of the head to the bearing surface. For the root countersunk head type, the cutting plane should be from the top of the head to the head. For countersunk heads, the top of the head should be at the intersection of the cone and the nominal diameter of the thread.
The cone support surface of the countersunk head and the nominal diameter of the thread need not be depicted as a standard entity, but only a reference dimension.

Support surface: The tolerance of the screw support surface of the screw to the axis of the rod is 2.
Metric machine screws cross recess insertion depth: The cross recess insertion depth measurement should be parallel to the screw axis, from the intersection of the maximum diameter of the cross recess and the top surface of the cross head to the bottom of the cross recess.
The cross slot insertion depth is listed in the corresponding dimension table.
Metric machine screws slot depth: Slot depth should be measured parallel to the screw axis.
Shape tolerance: The coaxiality between the screw head and the axis of the rod or the groove and the axis of the rod is as follows:
The correct position of the head: the screw head and the rod should be coaxial. The concentricity tolerance is 6% of the maximum head diameter. For hex heads and hex flange heads, the concentricity tolerance is 6% of the maximum width of the opposite side, regardless of the shape size.

The correct position of the cross recess: the screw cross groove and the rod should be coaxial. The concentricity tolerance is 12% or 0.030 in. of the nominal diameter of the screw (both of which are larger), regardless of the shape size.
The correct position of the slot: the screw slot (slot) should be symmetrical with the stem. The symmetry tolerance is 12% or 0.02in of the nominal diameter of the screw (both of which are larger), regardless of the shape size.
Rounded corners: In order to ensure the strength meets the requirements, the joint between the head and the rod of the Metric machine screws should have a clear rounded corner. The radius of the fillet should be large enough. For large flat head screws and pan head screws with a nominal diameter of less than or equal to #6, the corner radius of the head should not be greater than 25% of the nominal diameter of the screw. The radius of the fillet of other head screws should not be greater than 15% of the nominal diameter of the screw. The fillet radius of the countersunk head should be no more than 40% of the nominal diameter of the screw.
annie.li@szsst88.com
10 月-07-2018
kalyn
![Metric Machine Screws Head - [Shi Shi Tong]](https://www.sstls.com/wp-content/uploads/2019/09/1-e1568019409120.png)
 +86 13143444311
 sst@szsst88.com